Friday, 30 November 2012

White on white

Hi all,

Here is my entry for the White on White challenge over on PapercraftJunkies. I'm sorry about the photograph but it is white, honest.

I have made a 'Cherub Cot and Presentation box' using the Arty Farty templates and white card. I have decorated the box with small white daisy braid around the acetate aperture. The aperture in the headboard of the cot has a white lacy fabric to add effect and above it, I have used gold coloured peel offs to put the word 'BABY', these are each in a gold building brick peel off, (I didn't think white would stand out and is still in keeping with the rules.)


 Inside the cot, I have made a quilt cover using a white silky material and edged it with white lace. The mobile is made using white card and some teddy motifs attached to white thread and a white flower bead. The tag is made from the same white card, has some ribbon threaded through and the word 'Congratulations' on it using gold peel offs to match the wording on the cot headboard.


 This is the mobile with the teddies.


Challenge
PapercraftJunkies - White on White - No 4 - http://papercraftjunkieschallenges.blogspot.co.uk/2012/11/challenge-4-white-on-white.html

I have just noticed that I am number 13 in the challenge. Oh dear!! Someone has to be, I guess.

Thank you for calling by.

Happy crafting

Wendy xx

Wednesday, 28 November 2012

For a Special Friend

Hi everyone,

Today's card is one I made with a friend in mind. She has had a horrible year - her daughter moved over to Australia to live earlier this year. The daughter came back in July to get married and then returned to Australia with her husband; her son and daughter in law are due to have a baby any time now but I think my friend is feeling a little left out and would like to be able to do more with helping to prepare things for the baby, also I think there has been some disagreements between them; their business is not doing too well in the recession and worst of all, her Dad was diagnosed with cancer and is not expected to see the year out. So, A, you know who you are, this is for you!

I used the 'Snowman' CD Rom from Crafters Companion for the image and backing papers. The image is decoupaged and I cut the corners with Fiskars scissors to make a concave(?) corner on all 4 corners. I matted and layered this onto silver mirri and then onto dark blue centura pearl card. I did the same with all of the corners to make them match. I fixed two gems to the snowman for his 'coal' buttons and coloured these with a black marker as I didn't have black gems in my stash. I cut a piece of acetate that was slightly larger than the mats so that it would bow a little to add dimension. As I wanted a snow effect on this, I put dabs of  'Dries Clear' adhesive intermittently onto the acetate and then sprinkled with glitter. I then attached it to the topper with red liner tape.


I made an easel card from white cardstock. I matted and layered a darkish blue backing paper from the Cd onto silver mirri and then onto dark blue centura pearl. I did this twice. The first one was placed onto the top part of the easel and then the topper and acetate was secured to this, again using red liner tape. The second piece was placed on the bottom of the easel. Before I attached this, I attached a dark blue ribbon and then a narrower silver ribbon to the inner part of the blue ribbon. I then tied a bow using both types of ribbon and attached this to the band of blue ribbon. To make the stopper, I printed a sentiment onto card and put this through my hot foil machine using silver foil. I cut the corners to match the topper, chalked it with mid blue chalk to match the lighter backing paper and matted and layered this onto silver mirri and then onto the dark blue centura pearl. I secured this to the card using silicone glue. I cut some snowflakes from white card using the Pot Pourri Cricut cartridge and chalked these also with the chalk. I attached a silver gem to the centre of each of the snowflakes and then  attached the snowflakes to the card.


The acetate cover, bowed to give dimension.


I would like to enter this card for the following challenges:-
Kraftyhands - Christmas Creations - use at least one Crafters Companion or Kraftyhands product http://kraftyhandschallenge.blogspot.co.uk/2012_11_01_archive.html
My Craft Creations - All Things Christmas http://craftcreatoins.blogspot.co.uk/p/all-things-christmas.html
Allsorts Challenge - Bring on the Bling http://allsortschallenge.blogspot.co.uk/2012/11/week-182-bring-on-bling.html
Crafters Companion - Favourite Colour Combination - use at least one Crafters Companion product http://ccmonthlychallenge.blogspot.co.uk/2012/11/november-challenge-favourite-colour.html
Glitter n Sparkle - Number 8 - Ribbon and or lace http://glitternsparklechallengeblog.blogspot.co.uk/2012_11_01_archive.html
Crafty Ribbons Challenge - Number 33 - Use at least two ribbons http://craftyribbonschallenge.blogspot.co.uk/

Thank you for calling by.

Happy crafting.

Wendy xx

Tuesday, 27 November 2012

Attention all dieters!!

Hi folks,

Today I thought I would share with you some non fattening cupcakes that I took to the craft fair. I wasn't sure whether to take them or not but hubby thought I should, so I did.

They are non fattening because they are a rolled up white face cloth with a bath pearl on top for the cherry and placed into a cupcake warapper. The cupcake wrapper was made using the Elmo's Party Cricut cartridge. I used backing papers from the Garden Delights Volume 2 CD Rom from Cupcakecrafting and one from the Polka Doodles Paper Boutique Volume 3 and printed them onto card. I held the facecloth together with a coordinating ribbon and secured the bath pearl with a 3d foam pad.  Just to cover myself, I made a label with the ingredients of the bath pearl and put this inside of the cupcake wrapper. A lot less calories, I'm sure you'll agree!! Lol.


Thank you for calling by.

Wendy xx

Monday, 26 November 2012

Village Craft Fair

Hi

This blog was supposed to be posted yesterday but had trouble uploading the photographs, anyway, they are done now.

As some of you may know, I went to my craft fair on Saturday and did reasonably better than I thought I would. Not as well as Sylvia though, well done to her.

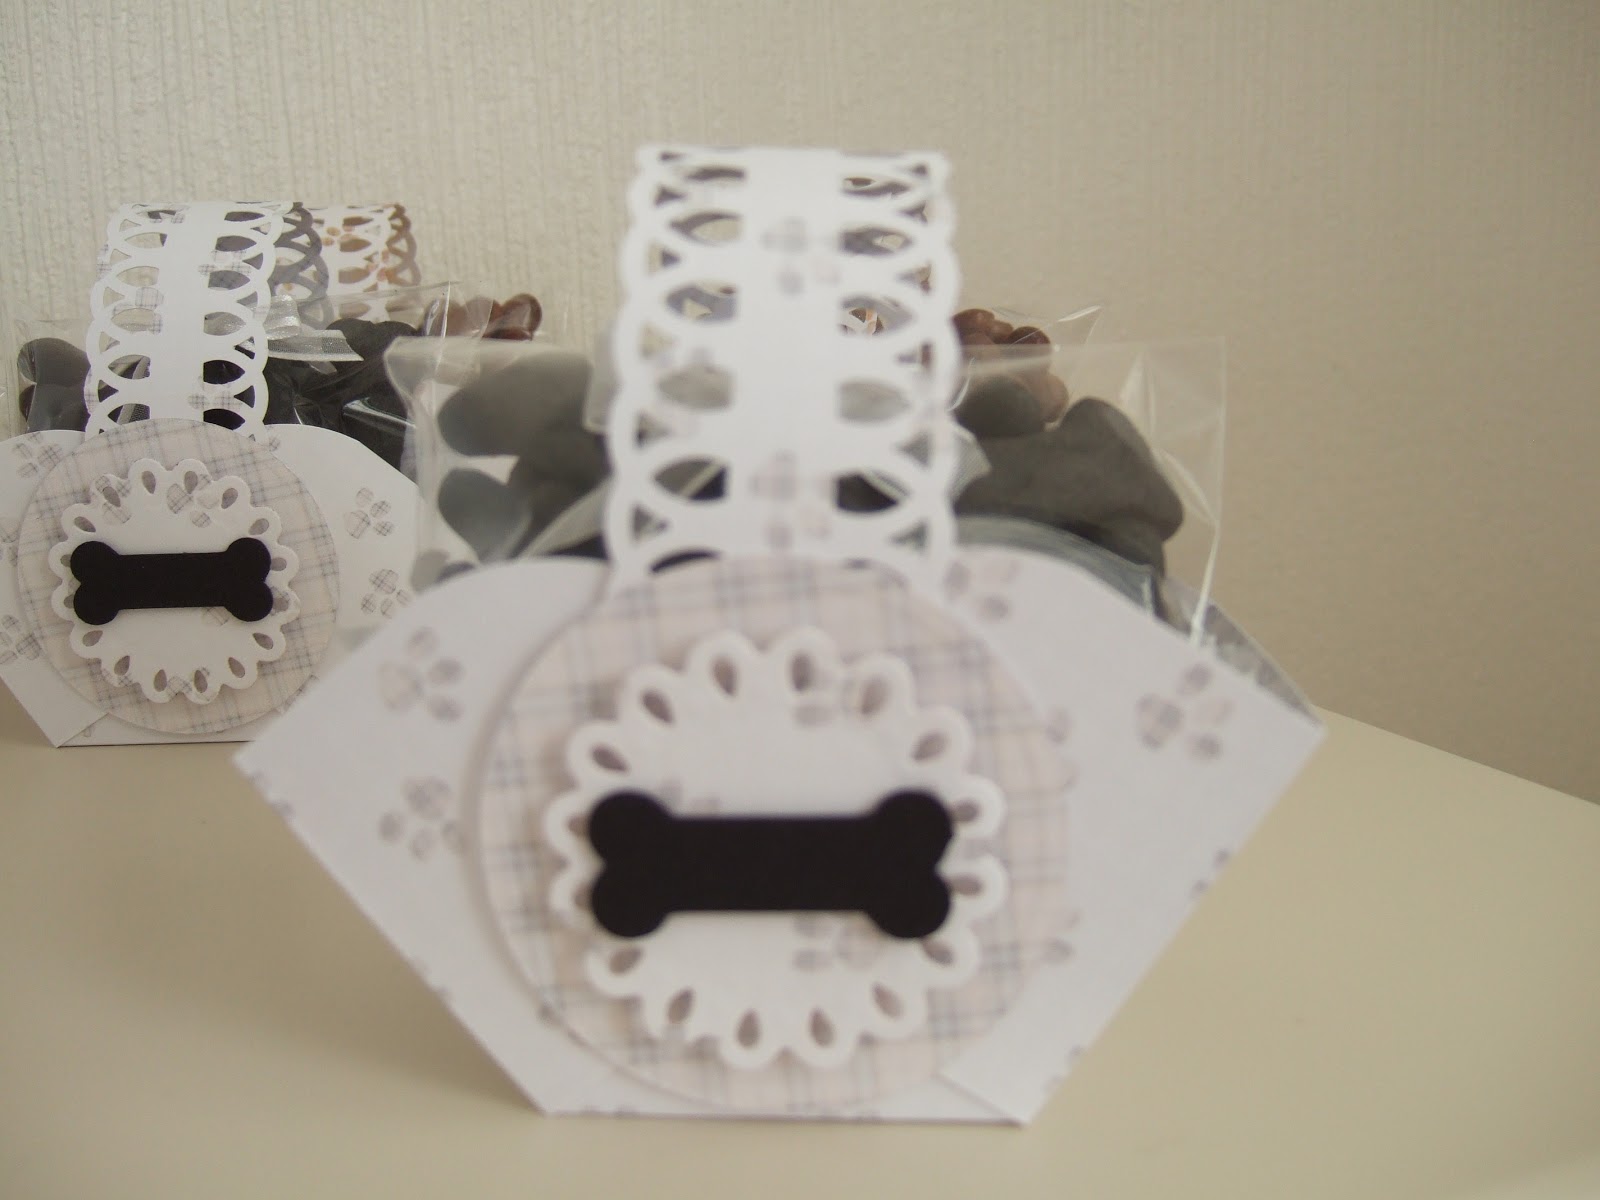
The cards I sold the most of were Kanban cards and one of my Cupcakecrafting cards. I had also made some desk calendars using the Moreheads CD Rom by Crafters Companion and some baskets with doggy treats and bird food using the Garden Delights CD Rom and the Paws for Thought CD Rom, both from Cupcakecrafting. I also made som baskets with cat treats in using the Polka Doodles Paper Boutiques CD Rom but these didn't sell - maybe more dog owners than cat owners in my village.

Here are some photographs of some of my wares!!


I wasn't sure whether they would sell or not so only made a few.


These are two of my favourites, although I like most of the images on this CD.


Here are some of the baskets.


I also added a sign on a lolly pop stick that said 'Feed the birds, Tuppence a bag' using one of the 'labels' dies from Spellbinders. This was an after thought and had already taken my photographs by the time I remembered to do it. I made the baskets using card, filled the bottom with shredded tissue paper, part filled a cello bag with bird seed and put a bow on the front. You can't quite see it on this photograph. I used a Martha Stewart punch to decorate the handle.


These are my doggy treat baskets. Again, I did the same thing as with the bird food baskets but used the Paws for Thought CD Rom. The card is printed on both sides. I used my Spellbinders dies for the circle and the scalloped circle and then cut the bone using the Pot Pourri Cricut cartridge using black/brown card, depending on the colour of the backing paper and doggy treats. Again, I filled a cello bag with doggy bones - charcoal or gravy flavoured depending on the colour of the basket and put a bow on the front of the bag.

I was pleased they sold, but sad that they sold better than my cards.

Not to worry, I have one more craft fair to attend. If the cards don't sell there, I have my Christmas cards already made!! They will be a lot more elaborate than I usually send to people I don't see very often!! Lol!

Thank you for popping along. If you have time please leave a comment, I always like to read what you think.

Thank you  and Happy Crafting.

Wendy
xx

Thursday, 22 November 2012

Paws for Thought

Hi everyone,

Today i thought I would share a few cards that I have made using the Paws for Thought Volume 2  CD Rom from Cupcakecrafting. I have made these for a craft fair that I am going to on Saturday. I planned to take some Christmas Cards, everyday cards and some other little gift nick nacks that I have made. The craft fair is in the local village hall and the village is full of 'doggy' people, so hoped these would go down well. Fingers crossed.

The cards are all ready in cello bags so I apologise if these are shiny on the photographs.


This first one is a cocker spaniel, I tried to keep it plainish, then it could be used for either a lady or a gentleman, although it does have some bling in the form of gems in the corner and on the ribbon.


The second is the Irish Water Spaniel. Again I tried to keep it for either sex. I do tend to make a lot of cards for women, so this was my way of balancing it out.


This is the Golden Retriever. This is a 6x6 card and although it has flowers on, hoped that this would appeal to either sex. Below is a matching notebook and pen. I inserted a piece of coordinating backing paper into the pen to try and make it look as if it matched the notebook. I'm not sure about these two items, I think I might use these myself. I think the backing on the notebook looks a bit dowdy. We'll see how I feel on the day.


Thank you for popping along. I hope to show you some more things that I have made for the craft fair tomorrow if you have time to pop over.

Happy crafting.

Wendy

Tuesday, 20 November 2012

Tatty Ted 18th

Hi everyone,

I had a little trouble with my blog yesterday. I was tinkering about with it and lost the toolbar a the top of the page. I don't know if this is important but it makes life a lot easier having it there. Nobody could help me get it back, so I decided to change the template. I preferred the template I had, but hey, I like blue, so we will give this one a go for a while. If anyone knows how I can fix the other one or how to change the font on the blog, please let me know.

 
Now for today's card. I thought I would share with you a Tatty Ted 18th birthday card that I made. It is just a simple A4 card with a topper that I decoupaged and matted and layered onto silver mirri card. I chose a backing paper also from the Docrafts Me to You CD Rom and matted and layered this onto silver mirri. This was then matted onto a piece of white card to which I tied a matching turquoise bow before attaching the whole thing to the A4 card. I fixed a glittery number '18' to the balloon and wrote the recipients name onto the tag on one of the presents, although this is difficult to see on this photograph.

I hope you like it and thank you for stopping by.

Happy crafting.

Wendy xx

Monday, 19 November 2012

A Fishing Card

Hi everyone,

Today, I thought I would post a card I made for my son's 17th birthday.

I used Joanna Sheen's Messy Rabbit cd to make an A4 size card. For the front topper, I used an image of Messy Rabbit fishing and attached some nylon thread with a fishing lure on the end.


On the inside, I made a pocket for some vouchers to enable him to start driving lessons.


 The topper on the third page was an image of Messy Rabbit driving a car and I put an 'L' plate  embellishment around it.


On the fourth page, I put a photograph which my son had taken once when he was fishing. On the fifth page was the verse.


He was thrilled with the driving lessons and couldn't wait to get started. We had booked a lesson for the morning of his birthday, so he hadn't got long to wait for his first one.


Thank you for popping over. Please leave a comment, I enjoy reading your feedback.
 
Happy crafting.
 
Wendy
xx